Wk 10 // photo-printing experiments
- Apr 22, 2023
- 7 min read
Updated: Apr 28, 2023
I've been wanting to get into different photo-printing processes for a while and this week had the opportunity to give it a try! A friend of mine, Greg, works at AUT and used be their print technician on site - as he has his own print-making practice and access to the space, he offered to show me the ropes as a 'visiting artist', so we spent a day at the campus' print studio testing out a few different images. I didn't take any photographs of the space as I wasn't sure of the privacy around it, but I feel really lucky to have been able to give things a try :)
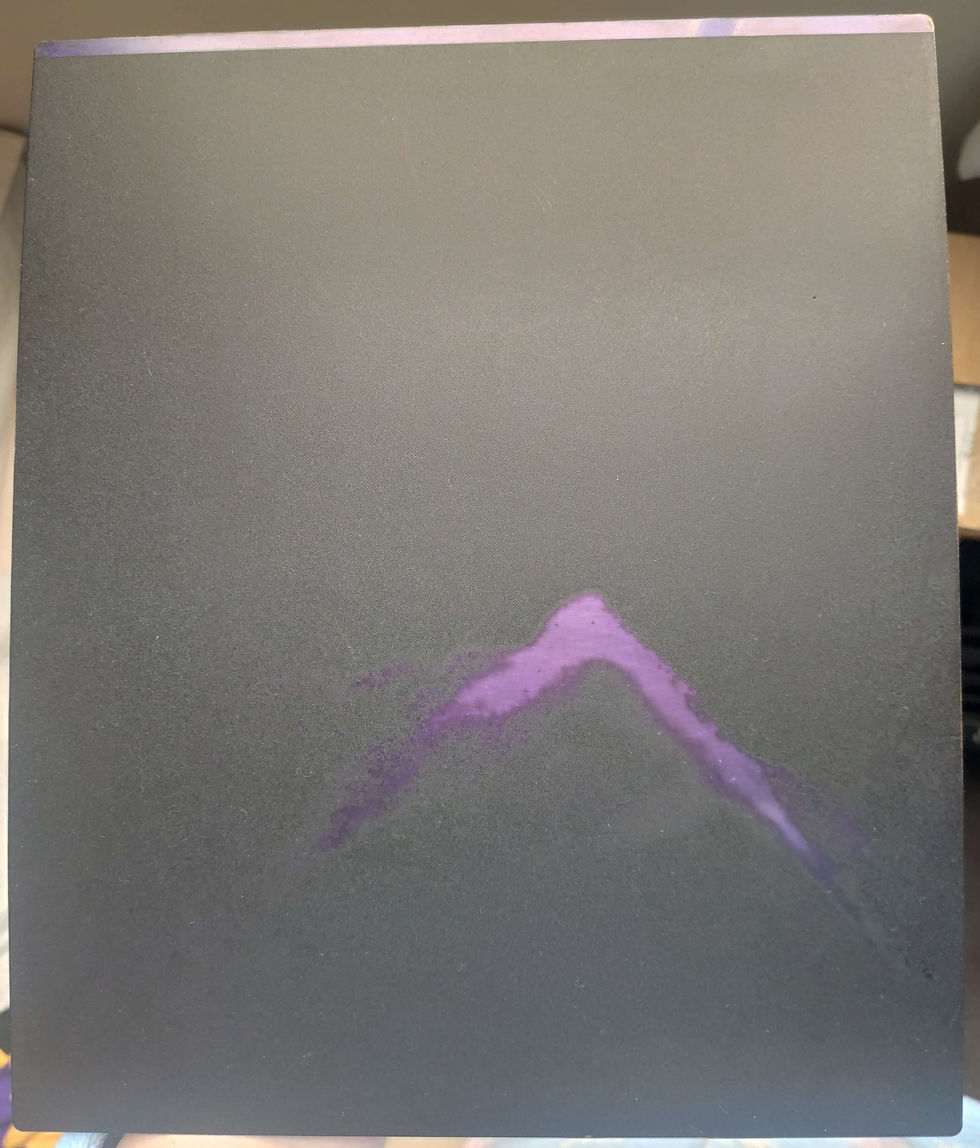
Below are the results from the two images I chose - the first of is from one of the point cloud scans made on Maungakiekie/Cornwall Park, and the second from a small point cloud video experiment.

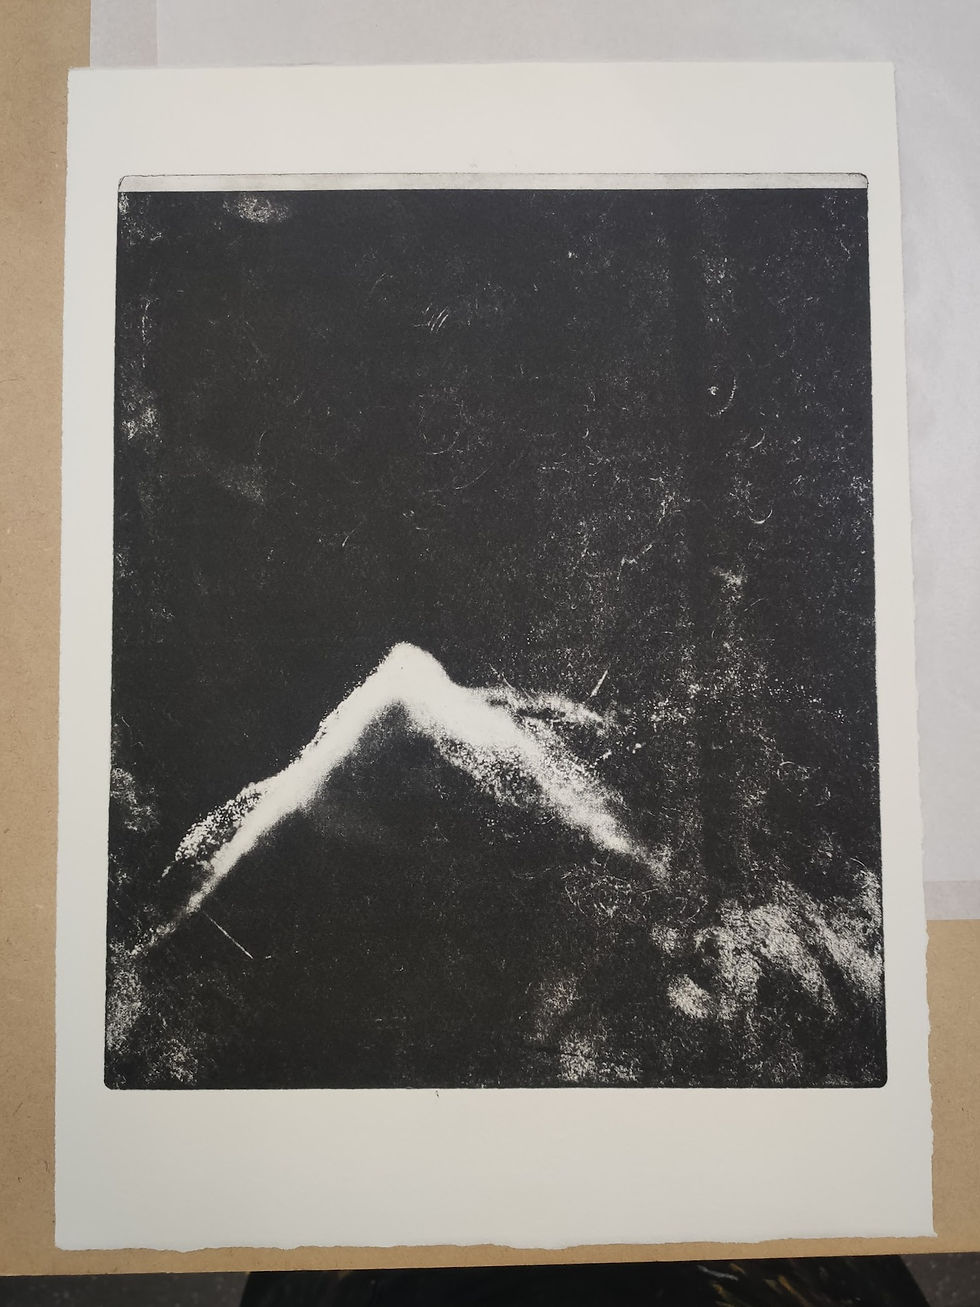
This is the first time I've tried this particular technique, and if you look closely on the second image you can see some accidental fingerprints left on the ink during the wiping process along with a lot of scratches from some dried ink blobs I didn't remove properly and were wiped around. To be honest I really love these "flaws", and as Greg pointed out the image would probably look a little boring without some variation and surprises. The fingerprints look a little moss- or lichen-like to me, which ties into the mountainous/landscape idea well. The first image above is my favourite from the day, and while the lines on each side of it were accidental due to the image being slightly too small for the plate, I really like how they frame the print - I think small accidents like this add a nice tangibility to them (a hint of the printing plate itself perhaps?).
I absolutely loved this process and how the images turned out, and would love to keep exploring this process in future. Conceptually, I've been wanting to look into lithography (due to the link between early map-making and landscape imagery and the content I'm working with), however there are very few places to do that kind of work in New Zealand; this could be a good midpoint perhaps...
The process is messy but relatively simple - instead of acid etching the metal plate, we used photo-sensitive film to create a resist in the surface (which means it can be reused several times but also removed afterwards so that the plate can be recycled). Below are some notes I took during the day :)
Preparing the printing plate:
aluminium can be used, but steel is best as it is more resilient
measure the plate's dimensions for later; round off edges and sand smooth; knock down sharp corners with a rasp
scrub with an abrasive sponge (green kind) to remove any existing ink or residue, then rasp with wire brush to give some tooth for the film and ink to stick to (diagonally each way, in circles, etc.)
it is important to remove any grease from the plate as if not, the photo-sensitive film and ink won't stick to it! Scrub the plate with a solution of sugar soap and water and whiting (aka ground pumice), and rinse well with water. From here, don't touch surface! It needs to be grease proof; lift by the back surface or edges
dry with a hair drier; place on paper sheet on the printing press (to protect the printing press from any remaining sharp edges on the rear side); use a soft clean brush to remove any dust from the plate
cut the light sensitive film to size (work quickly and store excess in a light-proof container/bag)
remove protective plastic film from one side of the photo film - use tape on corner to help; lay the film exposed side down over the plate
roll through the printing press; trim excess film from the plate using a craft knife (any large air bubbles can also be popped gently with the point); then reroll through the press
store the plates in a light-proof place until use
Preparing the image and developer:
for the print: chose an image and adjust levels in Photoshop (want some contrast to it but don't overwork)
adjust the image size to measurements of the plate (and 300 ppi) and print on transparency film
for developer: mix soda ash with water (as per recommendations on box) and pour solution into a tray deep enough to submerge the plate
make sure to have a light-proof cover of some kind on hand to put over the tub (spare board, etc.)
Exposing the plate:
if using an image with a lot of dark/black space in it, it's important to first expose the plate using an aquatint screen (dotted transparency) - the micro dots help the ink stick to the plate; without doing this it won't adhere properly. Link to how to make one: https://userpages.umbc.edu/~custen/ART375/PolymerPlateProcessing.html
carefully handling the plate, place spotted transparency over (if using) matte side down and expose to UV light source
next, expose the plate with the image transparency in the same way
gently tap the edge of the plate with a hard object to losing the remaining protective plastic layer on the light-sensitive film, and peel off
carefully place the plate in the developer and cover for a minute or so
gently use a sponge (wiping in one direction) to remove excess; if not much comes off, you may need to develop it longer
rinse in cold water; waterblast for 30-60 seconds to remove any excess photosensitive film
using a hairdryer on the cold air setting, gently dry the plate and leave to cure (ideally for at least a day before using, but it can be used after around half an hour of curing time)
Preparing paper for printing
fill a tray with water and soak your printing and proofing papers (you may wish to do a test print first); it's pretty forgiving stuff; let it soak for at least 10 minutes or so before printing
Place a towel on a flat surface and have some tongs nearby to remove the paper from the water
place a spare piece of tissue or newsprint on the printing press to protect it from the plate
Inking the plate:
WEAR GLOVES - the ink is oil-based and messy stuff!
when removing ink from the tin, dig down the side of it - the top surface of the ink will protects it from drying out fully; don't dig into the middle as it will dry down into these grooves. Removing by digging under the top surface from the edge of the tin is the best option. Use a plastic knife or small spatula
spread the ink on a glass plate using a flat, flexible metal spatula; check for any dry blobs and remove them as they will cause issues in printing if left in; when done, spread thinly into a rectangle
using a small piece of printing squeegee with a clean flat edge, scoop some ink with it as if screen-printing and apply it to the plate (45' angle with pressure); work it around in different angles, turning the plate as you go (try to avoid touching its surface; support it with your other hand off the edge of the table)
when fully coated, take a mull (a ball of muslin cloth) and wipe towards centre from all edges or in one direction at a time; this will remove excess ink from the surface; turn the mull over as the spaces in the fabric fill with ink; you should begin to see some of the blue film coming through, but don't overwork it
next, take some paper (pages of an old phonebook are perfect); using one piece under one hand to hold the plate in place, take another sheet and laying it flat, rub it in gentle circles over the sheet. This will remove any excess ink remaining; it should glide smoothly if enough ink has been removed with the maul - if not, you may need to repeat the prior step
finally, to smooth the surface, take a piece of tissue paper and as with the previous step, gently rub the surface; it should sound a little dry when ready
place the plate on the printing press (on the tissue/newsprint) and remove gloves :)
To print!:
remove paper from water using tongs and gently dry between layers of towel
carefully align with plate, and lay it down gently - do not move it around once it has made contact with the plate and it will leave uneven marks
place tissue paper or newsprint over the paper, then run through the roller mill in a smooth continuous motion - don't stop in the middle as it will leave lines
remove the paper by lifting it from one corner in a smooth motion
place between layers of tissue paper between two hard, flat board or other objects and allow to dry for 5 days so the oil-based ink can cure
the printing plates can be re-inked at this stage as above and reprinted, though after 5 or 6 prints the photo-emulsion may start to wear in some places

Misc brainwaves
Stylistically, the black photoprints remind me a little of old textbook images - grayscale photos of animals, plants, etc. that are supposed to provide some sort of context for the text they accompany but always seem too grainy to read well
The photo-print plates themselves (photos TBA once dry) also remind me a little of the Pioneer Plaque, Golden Record, and other space craft-associated etched plates - attached to probes and rovers, carrying information either for ourselves ("send your name to Mars", plaques honouring healthcare workers during the Covid-19 pandemic, etc.) or others who may come across them (stylised information about our solar system, human anatomy, etc.).
There's a cartography element to printing that has interested me for a while - apparently early maps were often created via lithography, including early maps of Aotearoa New Zealand.
There's also the photographic connection to the plates - not only in the transfer of an image into print, but to traditional wet plate photography processes (daguerreotypes, tintypes, etc.)


Comments